Beginner's Guide to UK Coastal Paths: Gradients, Stiles and Waymarking
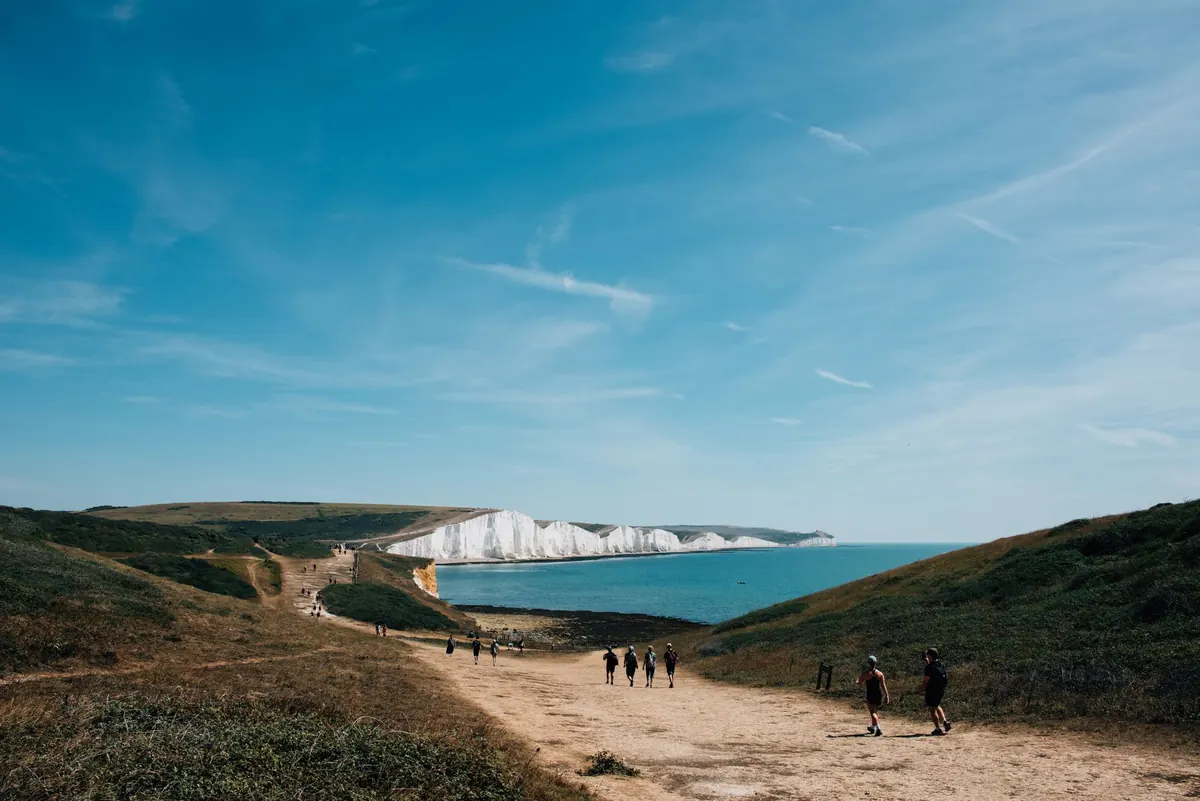
A coastal path rarely behaves like a towpath. In the first mile it might drop into a wooded combe, climb out on cut granite steps, squeeze through a gap beside a hedge, and leave you facing a fingerpost with three arms pointing in roughly the same direction. None of it is hard once you know what you are looking at. What follows is an introduction to the three things that trip up most beginners: gradient, stiles and waymarking. It also adds two practical sections on tides, weather and what to carry, because on the coast these are not optional extras.
Reading gradients before you feel them
Steepness is written on the map before you leave the house. On an Ordnance Survey map, contours spaced widely apart mean gentle ground. Four or five lines bunched within a couple of centimetres mean a sharp pull, and on a coast that usually means steps.
Percentages help, too. A 10 per cent slope, roughly ten metres of climb for every hundred metres forward, is noticeable but comfortable. Twenty per cent will have most people breathing hard. Steeper than that on a coast path is usually short — the climb out of a cove, the back of a headland — but it can come round a dozen times in a day.
That repetition is the real coastal trap: a five-mile stretch of the South West Coast Path can involve more total climbing than a hill walk twice its length inland, because the route keeps dropping to sea level and rising again. A rough rule of thumb helps with planning. Allow an hour for every five kilometres, plus a minute for every ten metres of ascent. It is not precise, but it stops you underestimating a short walk with big hills.
For example, an eight-kilometre coastal section with 300 metres of ascent works out at roughly 96 minutes for distance plus 30 minutes for climbing, so about two hours ten minutes of walking. Add twenty or thirty minutes for stiles, photographs, a steep descent and a stop to admire the view, and a walk that looked like a morning on paper becomes a half-day. That is not a problem if you planned for it. It is miserable if you did not.
Allow one hour for every five kilometres, plus one minute for every ten metres of ascent. Then add time for stiles, mud, photographs and the pub.
Map clues that matter on the coast
- Tight contour clusters near the shoreline almost always mean steps or a very steep zigzag. Expect to slow down, especially in wet weather.
- Cliff symbols and hatch marks show where the ground falls away. They are a warning not to cut corners, even when a faint path seems to head closer to the edge.
- Blue lines and beach names may indicate a route that crosses sand, shingle or an estuary. Check the tide before you rely on it.
- Access land and path markings help you see where you may walk, but they do not tell you how rough the going will be underfoot.
Underfoot: what actually slows you down
Gradient is only half the story. The surface decides your pace.
- Granite or timber steps. Kind on the way up, punishing on the way down, particularly when wet. Take them one at a time and use the handrail if there is one.
- Clay and mud. Common on wooded sections and shaded lanes. Grip matters more than cushioning, so a shallow-lugged walking shoe will beat a smooth trainer badly here.
- Shingle and soft sand. Slow and tiring, and usually easier near the water's edge where the sand is firmer, provided the tide allows it.
- Boardwalk and duckboards. Fast and kind to the feet, but slippery when wet or frosty.
- Rock and boulders. Common on the more rugged sections. They demand concentration, especially when covered with seaweed or spray.
Allow more time after rain. A route you would walk in three dry hours can take four when every descent is greasy. Footwear makes a difference, but no shoe or boot grips well on wet clay, so adjust your pace rather than trusting the tread. Walking poles can help on loose descents and long flights of steps, though they can be awkward over stiles and squeeze gaps.
Stiles, gates and gaps
Most coastal paths in England and Wales cross farmland, so you will meet stiles. They come in a handful of types.
- Step stiles: wooden or stone steps over a wall or hedge, often with a narrow gap beside them for dogs.
- Squeeze stiles: a slot in a wall. Fine without a pack, awkward with a big rucksack. Take it sideways if there is room.
- Ladder stiles: a small ladder over a fence or hedge, common where the ground rises.
- Kissing gates: a hinged gate that swings both ways. The easiest option, and increasingly the replacement for stiles.
- Gaps and bridle gates: walk straight through.
Cross facing the stile, keep your weight over your feet, and swing your pack across rather than climbing with it on. Dogs can usually be lifted over or sent through a dog gate. Always close a gate behind you unless it is clearly tied open, and never climb a wall beside a stile because the crossing looks awkward. If you find a gate where your map shows a stile, nothing is wrong: stiles are steadily being removed to make paths more accessible.
It also helps to think about stiles as bottlenecks. A group of six walkers can lose five minutes at a single awkward stile, and a section with ten of them will feel much longer than the map suggests. If you are walking with children or a dog, add a little extra time and be patient at the tricky ones.
How waymarking works
National Trails in England and Wales, including the South West Coast Path, the Pembrokeshire Coast Path and the Norfolk Coast Path, use the acorn symbol on discs, posts and fingerposts. Local paths use their own markers, and in Scotland access works differently again under the Scottish Outdoor Access Code, with a right of responsible access and often less consistent waymarking.
In England and Wales, local public footpaths often use yellow arrow waymarks. Bridleways use blue arrows, restricted byways use purple, and byways open to all traffic use orange. These colours tell you what the path is legally for, not automatically which way to go, but they are useful confirmation that you are on a public route. National Trail acorns are the strongest clue of all: if you are following a long-distance coastal path, the acorn is usually your best friend.
What to do when the marker disappears
Waymarks are helpful, but they are not a substitute for a map. Fingerposts may point to a village rather than along the path, and a marker can be hidden by a hedge, faded by salt and sun, or missing after a storm. Stop and look for the obvious line of travel: a worn trod, a gap in a wall, a set of steps, or an acorn disc on the far side of a field. If two options look equally likely, check the map and compass rather than following the most trodden path. On popular coasts, the most trodden line sometimes leads to a viewpoint, not the route.
It is also worth remembering that waymarking can change. A path may be diverted around a landslip, a cliff fall or a working farm. In those cases, temporary signs usually appear, but not always. If a diversion is marked, follow it. Do not assume the original line on your map is still safe or open.
Tides, weather and the sea
Coastal walking adds two variables that inland walking rarely has: tides and exposure. Some routes cross beaches, estuary mouths or low-lying rocks that are only passable near low water. Check a local tide table before you set out, and do not rely on the route being available when you arrive. If the tide is coming in, turn back early rather than hoping to beat it. The sea can move faster than you can walk on soft sand.
Weather changes quickly on the coast. Sea fret can turn a clear headland into a grey room in minutes, and wind on an exposed cliff can make a safe path feel precarious. Carry a waterproof even on a bright morning, and be ready to shorten your day if visibility drops or the wind strengthens. Cliff edges are not the place to test your balance, especially in gusty conditions or when the ground is wet.
What to carry on a beginner's coastal walk
- Map and compass or a charged GPS device, plus a paper map as backup.
- Water and snacks for longer than you expect to be out.
- Waterproof jacket and spare layer even in summer.
- Sun cream, hat and sunglasses because sea glare is strong.
- Blister plasters and a small first aid kit.
- Phone and power bank in a waterproof case.
- Headtorch in winter or if your route may run late.
- Cash or card for a bus, taxi or unexpected cafe stop.
A sample beginner's day
Imagine an eight-kilometre coastal section with 250 metres of ascent, three stiles, one short beach crossing and a village halfway. Using the rule of thumb, allow about two hours of walking. Add thirty minutes for the beach, stiles and photos, plus a break at the village. Plan for three hours in total, and check the tide before you leave.
- Before you go: check the weather, tide times and bus connections at both ends.
- At the start: find the acorn or local waymark, then follow the map rather than guessing.
- On the climbs: shorten your stride, take steps steadily and drink before you feel thirsty.
- At stiles: take your pack off if needed, cross safely and close gates behind you.
- At the halfway point: reassess time, weather and energy. Turning back early is a good decision, not a failure.
Etiquette and access
Coastal paths are shared with farmers, dog walkers, runners and wildlife. Keep dogs on a lead around livestock and near cliff edges. Take litter home, including fruit peel. Stay on the path where erosion is a problem, and do not widen muddy sections by walking around them. Leave gates as you find them, and follow any temporary closures.
Finally, remember that waymarking, gradients and stiles are all just information. They tell you what the path is doing and how fast you might move. Read them early, plan with a margin, and a beginner's coastal walk becomes one of the most rewarding ways to spend a day outside.
Photo: Laura Stanley / Pexels